
10 Essential Ashtanga Yoga Poses: Names, Alignment, and Practice Tips

Ashtanga Yoga Poses
Ashtanga Yoga Poses with Names and Pictures

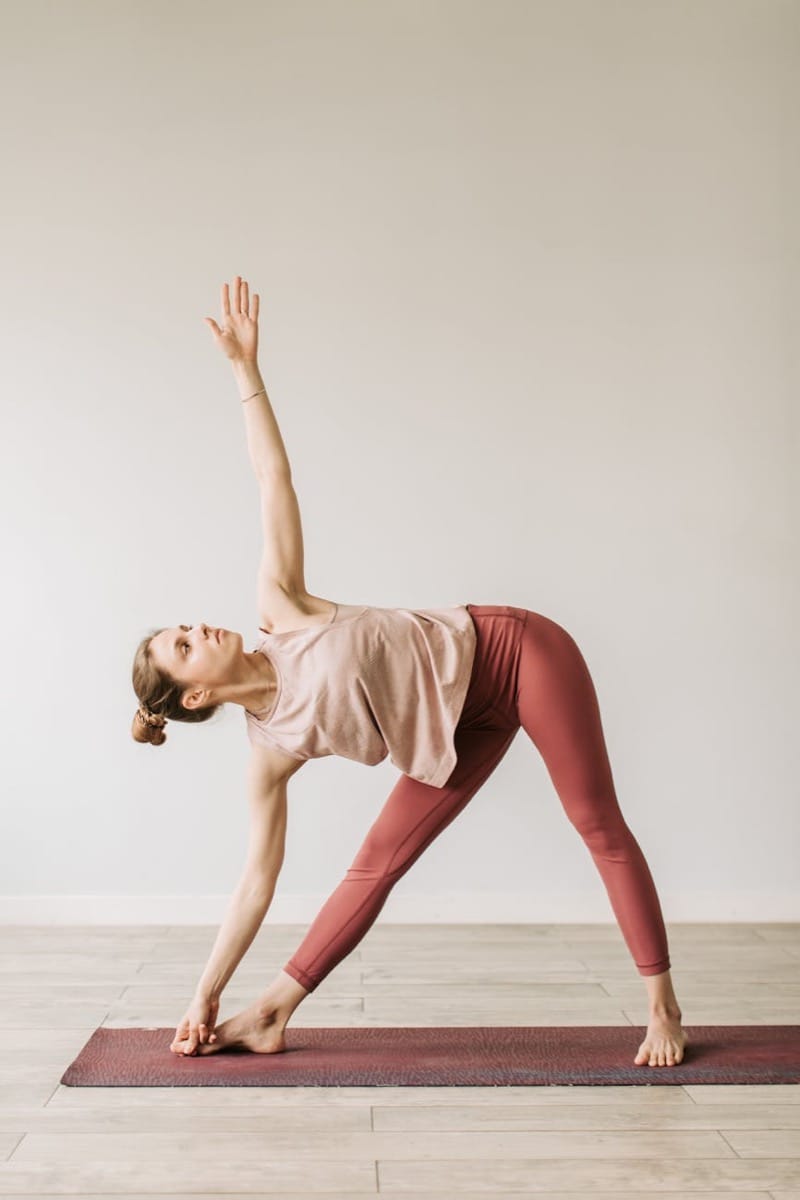
Master 10 foundational Ashtanga poses. Understand their Sanskrit names, alignment principles, and how they flow in the Primary Series.

If you're new to Ashtanga, the rigidity of the practice can feel overwhelming. The same sequence, the same breath count, the same poses in the same order—every time. But that structure isn't punishment. It's the point. By repeating the same poses in the same order, your body learns. Your breath settles. Your mind stops searching for what comes next and finally arrives. This article walks you through 10 essential Ashtanga poses you'll meet in the Primary Series, with the alignment cues and Sanskrit names you need to practice them safely and well.

What Makes Ashtanga Different From Other Yoga Styles

Ashtanga Yoga, systematized by Sri Pattabhi Jois in the 20th century, is a fixed sequence of postures performed in a specific order, always. Pattabhi Jois learned from Krishnamacharya, the teacher who shaped modern yoga itself. The Primary Series (Yoga Chikitsa, or yoga therapy) contains 48 core asanas plus transitional poses—115 total—held for five breaths each and linked by vinyasas, flowing sequences that synchronize movement with breath. This isn't creative yoga. It's repetitive, and that repetition is the practice.

1. Surya Namaskar A (Sun Salutation A)

Surya Namaskar A is the gateway to Ashtanga. You'll do five rounds at the start of every practice. It links breath to movement: inhale for upward actions, exhale for forward folds and planks. The sequence moves you from Tadasana (mountain pose) through Uttanasana (forward fold), to Adho Mukha Svanasana (downward dog), and includes a low plumb-line plank called Chaturanga Dandasana. Each round builds heat and preps the spine and shoulders for deeper work ahead. In Ashtanga, precision matters: your feet stay hip-distance apart in Tadasana, your gaze (drishti) stays fixed, and your breath leads the movement, not the other way around.

2. Chaturanga Dandasana (Four-Limbed Staff Pose)

Chaturanga Dandasana is the Ashtanga equivalent of a lowered pushup, and it appears in every single vinyasa. Your body forms a plank with elbows bent at roughly 90 degrees, hugging tight to your ribs—not flared out like a push-up. Your shoulders stay above your elbows. This pose builds core and arm strength while preparing for deeper backbends later in the sequence. The risk: shoulder injury from sloppy alignment. Keep your chest slightly forward of your shoulders, press firmly through your palms, and engage your core. Your drishti (gaze point) is forward, toward the tip of your nose. Don't rush these. Quality matters more than speed.

3. Adho Mukha Svanasana (Downward-Facing Dog)

Downward Dog appears dozens of times in the Primary Series—in every vinyasa, as a pose in its own right (held for five breaths), and as a resting point. In Ashtanga, it's not a casual stretch. Your hands press evenly into the mat, fingers spread wide. Create an equilateral triangle: the distance from your hands to your feet equals the distance from your hands to your shoulders. Your head stays between your upper arms, and your gaze falls to the space between your eyebrows (urdhva drishti, or the third eye drishti). Press your chest back toward your thighs. Engage your quadriceps to take pressure off your shoulders. This is where you learn to breathe steadily through effort.

4. Uttanasana (Standing Forward Fold)

Uttanasana appears in the Sun Salutations and as its own pose. From standing, fold forward with a flat back; your hamstrings and spinal extensors lengthen. In Ashtanga, you don't hang limply. Engage your quadriceps to soften your hamstrings, press your feet into the mat, and lengthen your spine on each inhale before folding deeper on each exhale. Your drishti is the tip of your nose. If your hamstrings are tight, bend your knees generously—honor your body's actual range, not the Instagram version. Your hands can grip the tops of your toes (padangusthasana) or the outsides of your feet (padahastasana), or rest on blocks. This fold opens the entire back body and calms the nervous system.

5. Utthita Trikonasana (Extended Triangle Pose)

Utthita Trikonasana is typically the first standing pose held for five breaths in the Primary Series. Step your left foot back and square your hips toward the long edge of your mat. Ground your feet, then extend your right arm forward and fold your torso over your right leg, stacking your shoulders. Your bottom hand presses to the mat or a block inside your right foot. Your top arm extends to the sky. Your drishti follows your top hand. This pose strengthens your legs, opens your hips and hamstrings, and begins to teach spinal rotation. The warning: don't let your front knee cave inward. Press firmly through the outer edge of your back foot.

6. Virabhadrasana I (Warrior I)

Virabhadrasana I appears twice in the Primary Series—right side, then left. Step your right foot forward and ground your back heel at a 45-degree angle. Square your hips as much as possible toward the front of your mat. Press your hands together at heart center or extend them overhead. Your front knee tracks over your ankle, and your back heel stays planted. This pose builds strength in your legs and opens your hip flexors and chest. Your gaze follows the line of your hands (nasagrai drishti, gazing to the tip of your nose, if your hands are at heart). The common mistake: letting your back hip swing open. Use your core to hold your hips square.

7. Adho Mukha Vrksasana (Downward-Facing Tree/Handstand Prep)

Adho Mukha Vrksasana is an arm balance that appears in the Primary Series and deepens as you progress. From Downward Dog, step your left foot forward between your hands, then your right foot. Bend your elbows slightly and let your hips sink toward your upper arms, testing your weight on your hands. Then step or hop both feet back to plank. This builds arm and core strength and preps you for deeper arm balances in the Intermediate Series. Don't force it. Many Ashtanga students practice this pose for months or years before holding it steadily. Your drishti is between your hands (nasagrai drishti). Consistency in practice matters far more than reaching the full expression quickly.

8. Paschimottanasana (Seated Forward Fold)

Paschimottanasana closes the standing sequence and teaches you how to work with your posterior chain. Sit with your legs extended, feet together. On an inhale, lengthen your spine. On an exhale, fold forward from your hips, not your waist. Your hands can grip your toes, the sides of your feet, or rest on your shins or blocks. This pose deeply stretches your hamstrings, calves, and spinal extensors. It calms the nervous system and symbolizes the inward turn of the mind that Ashtanga cultivates. Your drishti is the tip of your nose. If your lower back rounds excessively, bend your knees or sit on a block to tilt your pelvis forward. In Ashtanga, you hold this for five breaths, then move on. No forcing.

9. Purvottanasana (Upward Plank/Inclined Plane)

Purvottanasana is the counterpose to forward folds and appears after Paschimottanasana in the Primary Series. Sit with your legs extended. Place your hands on the mat behind you, fingers facing forward. Press firmly through your hands and feet, lifting your hips toward the ceiling. Your chest opens, and your head can drop back gently if your neck feels safe. This pose strengthens your arms, shoulders, and core while opening your chest and hip flexors. It also begins to prepare your spine for backbends. Your drishti is toward the third eye (urdhva drishti) or straight ahead if that strains your neck. Press your feet into the mat and engage your quadriceps to protect your lower back.

10. Urdhva Mukha Svanasana (Upward-Facing Dog)

Urdhva Mukha Svanasana is the updog portion of every vinyasa and appears as its own pose. From Chaturanga, roll your shoulders back and press your chest forward and up, keeping your legs engaged and your feet close to your body—your thighs stay roughly 1-2 inches off the mat. Your arms straighten (or stay slightly bent if you're building strength). Your gaze follows the direction of your chest. This pose strengthens your arms, shoulders, and back while opening your chest. It's also the first backbend most students meet in an Ashtanga practice. Don't collapse into your lower back; instead, engage your core and spread the extension evenly throughout your spine. Your drishti is brummadhya drishti (to the center of the eyebrows, or slightly upward).

How to Practice These Poses Safely in Ashtanga

Ashtanga is not a casual practice. The fixed sequence and breath-to-movement linkage (vinyasa) mean your body is constantly working, heating, and deepening. To practice safely: start with a qualified teacher who has trained with a lineage teacher or studied at an Ashtanga shala. Learn the exact alignment of each pose before you add speed or depth. Respect your body's actual range—Ashtanga isn't about impressive poses, it's about steady, consistent practice over years. Honor your breath; if you can't breathe smoothly, you've gone too far. If you have an injury or limitation, tell your teacher. Good Ashtanga teachers modify poses without shame. And don't chase the advanced series. The Primary Series is complete. Many teachers and long-time practitioners work the Primary Series their entire lives and find new depth every year.

Finding an Ashtanga Teacher and Shala

The best way to learn Ashtanga is in person, in a shala (studio), under a teacher trained in the lineage. Look for teachers certified through organizations like the Yoga Alliance (RYT-200 or RYT-500) or trained directly by lineage teachers like those who studied with Pattabhi Jois. The official Ashtanga Yoga Research Institute (AYRI) in Mysore, India, still operates and offers certification. If you're new, take beginner-focused classes. Many shalas offer Mysore-style classes, where you practice the sequence at your own pace while the teacher walks the room offering adjustments and guidance. This is the traditional way to learn. If you're in a location without an Ashtanga shala, look for online classes from reputable teachers, though nothing replaces hands-on feedback from a skilled teacher who can see your alignment.

These 10 poses form the foundation of the Ashtanga Primary Series. They're simple enough to learn, complex enough to spend a lifetime deepening. The repetition isn't boring—it's liberating. When your body knows the sequence, your mind can finally settle. That's where the real practice begins.

Go Deeper

Compare real programs in the OYP YTT Database:

learn essential ashtanga poses

Subscribe to the newsletter

Subscribe to my newsletter to get the latest updates and news