How to Do Crow Pose: Step-by-Step Instructions for Beginners

Ready to nail your first arm balance? Crow pose builds strength, balance, and focus. Here's exactly how to get there.
You've watched someone float into crow pose and thought: that's either magical or there's technique I'm missing. The second one's true. Crow pose, or bakasana, is where most yogis first experience the thrill of lifting their feet off the ground. It looks like a party trick, but it's actually a smart combination of wrist strength, core engagement, and the right mental approach. If you've tried it once and face-planted, or haven't tried it yet but want to know where to start, this guide breaks down the exact progression to get you there.
What Crow Pose Actually Requires
Crow pose isn't really an arm balance. It's a core balance that happens to use your arms. This distinction changes everything about how you train for it. Your arms are the cradle; your core is the engine. You need wrist stability to handle the weight shift, shoulder flexibility to find the right arm position, and abdominal strength to draw your knees toward your chest. Bakasana also demands focus—the moment you second-guess yourself, you collapse. This is why it shows up early in intermediate practice. It teaches you that yoga poses require commitment.
Build Wrist Strength First
Your wrists carry your whole body weight in crow pose. Many practitioners skip the prep and wonder why their wrists collapse. Don't be that person. Spend two weeks doing these:
Cat-Cow Flows with Finger Spread
Move slowly through cat-cow, pressing each finger firmly into the mat. Spread your fingers wide—this distributes force and builds stability. Spend 5-10 rounds here, twice a week.
Downward Dog Holds
Hold downward-facing dog for 10 breaths, five times, with intention on gripping the mat with your whole hand. Let your fingers root down equally. This builds the wrist extension strength you'll need.
Plank Variations
High plank with your shoulders stacked directly over your wrists trains the stability pattern. Hold for 20-30 seconds, rest, repeat. Do three rounds.
Strengthen Your Core in Crow Prep
In crow pose, your core has to be strong enough to lift your feet and tight enough to shift your center of gravity forward. These drills build both:
Boat Pose (Navasana)
Hold for 30 seconds, rest for 15 seconds, repeat five times. This teaches your lower belly to engage and stay engaged. Your shins should be parallel to the floor, chest upright. Most people don't go far enough in this pose—push it.
High Plank to Knee-to-Nose Pulses
From plank, draw your right knee toward your nose, extend, repeat. Twenty pulses per side. Feel your core tighten. This trains the core compression you'll do in the final pose.
Four-Limb Staff Pose (Chaturanga Holds)
Lower from plank and pause mid-way, elbows bent at 90 degrees, held close to your ribs. Hold for 10-15 seconds. Rest. Repeat five times. This builds the strength to hold your bodyweight on your hands.
The Step-by-Step Progression to Crow Pose
Stage 1: The Squat Setup
Come into a deep squat with feet together or slightly apart. Your hands plant on the inside of your feet, palms flat, fingers spread wide. Lean slightly forward. Feel where your hands stack under your hips. This is your foundation. Spend a few breaths here. Many practitioners don't go deep enough into the squat—your hips should be lower than your knees.
Stage 2: Wrists and Elbows Engaged
From the squat, place your hands shoulder-width apart. Tilt your torso forward, chest moving toward your thighs. Bend your elbows slightly so they face backward. Your upper arms will cradle the outer edges of your knees or mid-thighs. This is the moment your arms become useful. Breathe. Don't rush past this.
Stage 3: Knee-to-Armpit Connection
Press the outer edges of your knees (or thighs) against the backs of your upper arms. This isn't accidental—it's the cue that gives you height. Engage your abs. Look forward, not down. Your gaze should land about 6-8 inches in front of your fingertips. This focus point is crucial.
Stage 4: Weight Shift Forward
Slowly shift your weight forward. You're moving your center of gravity past your hands. This is the hardest part mentally. Most people don't commit. Shift about 70 percent of your weight onto your hands. Stay here for 3-5 breaths. If your feet lift, great. If not, that's fine too. You're building nerve and trust.
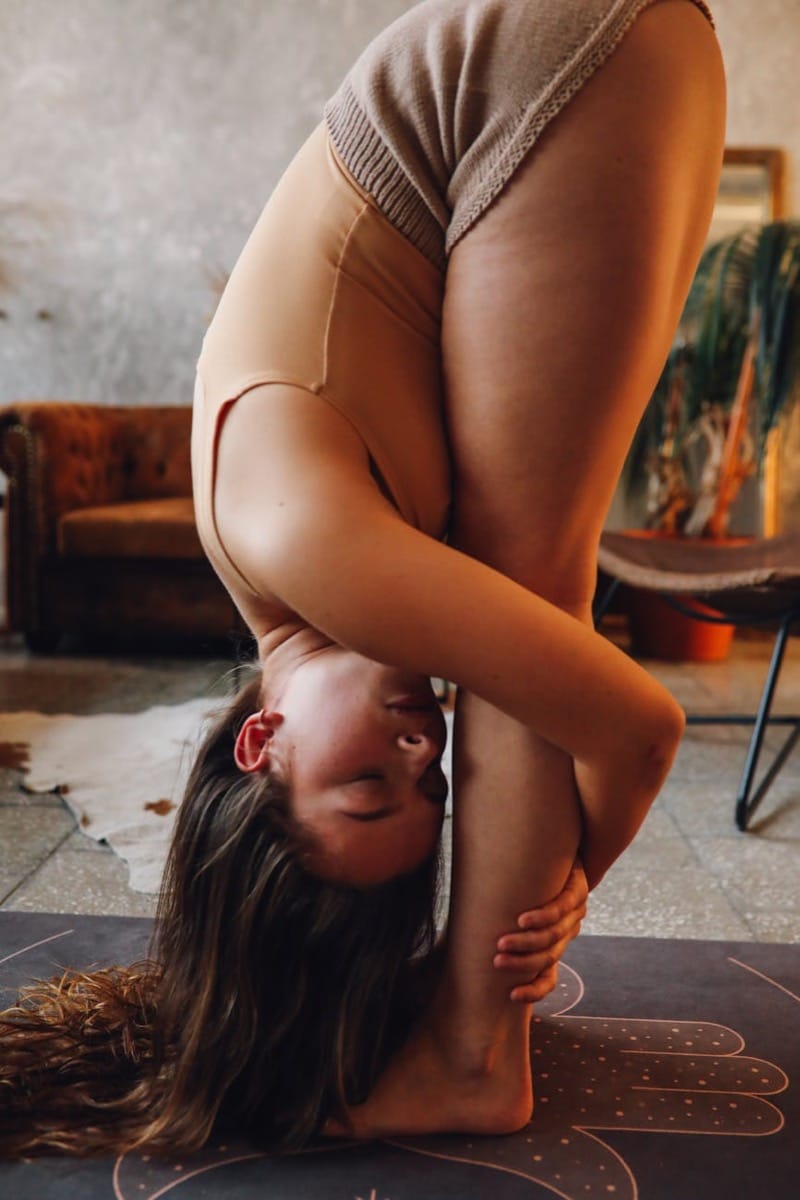
Stage 5: The Lift
Once your feet are light, engage your core hard and draw your belly toward your spine. Flex your thighs and press them against your arms. Your arms stay bent, not straight. Your feet lift naturally. Hold for 1-3 breaths. Exhale, step back. That's it. You did crow pose.
Common Mistakes to Avoid
Looking Down
Your gaze guides your weight. Look down and your weight falls down. Look forward and your torso tilts forward where it needs to be. Fix this first.
Straight Arms
Keep your elbows bent. Straight arms actually make crow harder. Your bent elbows cradle your knees and give you leverage.
Not Engaging Your Core
If you feel wobbly, you're dumping weight into your shoulders. Engage your abs first, then shift. Your core stability comes before your arm balance.
Pushing Too Hard Too Fast
Crow pose responds to patience. Spend 2-3 weeks in the progression stages. Your body needs to learn the pattern.
A Simple Practice Schedule
Three days per week, do this:
Warm-up: Five minutes of cat-cow flows with finger spread. Wrist and core prep: Ten minutes of the exercises listed above—boat pose, plank pulses, chaturanga holds. Crow progression: Ten minutes moving through stages 1-5 at your level. Don't rush. Rest: Step back, breathe, repeat one more time. This isn't a class flow. This is deliberate practice. Track which stage feels hard and spend extra time there.
When to Move Toward More Advanced Arm Balances
Once you can hold crow pose for 5+ breaths consistently, you have the foundation for more complex arm balances. Firefly pose (tittibhasana) and side crow (parsva bakasana) become possible. Eight-angle pose (astavakrasana) is next. But don't rush. Crow pose teaches you something more valuable than a new trick—it teaches you that commitment plus technique equals capability. That's yoga.
LEARN WITH BE WELL ACADEMY
Journey to Crow Pose
Dav Jones built this course around one thing: getting you into crow pose safely, with an anatomy-based approach that actually addresses why most people struggle. If you've been trying to get Bakasana and it's just not landing, this is the structured path.
Explore the Course →$129 · One-time · Lifetime accessGo Deeper
Compare real programs in the OYP YTT Database:
Related Reading
Subscribe to the newsletter
Subscribe to my newsletter to get the latest updates and news