How to Do Pigeon Pose: A Guide to Hip Opening and Proper Alignment

Learn proper pigeon pose alignment, setup, and modifications. Release hip tension safely with detailed cues for all levels.
If you spend your days at a desk, your hips are probably tight. Pigeon pose—eka pada rajakapotasana in Sanskrit—is one of the most effective ways to release that tension, but only when you approach it with care and awareness. Whether you're recovering from a long run, managing lower back discomfort, or simply noticing that your hip mobility has declined over time, pigeon pose offers real relief. This guide walks you through proper setup, common mistakes, and how to know when you need modifications.
Why Pigeon Pose Matters for Your Hips
Your hips house the largest joints in your body, supported by layers of muscle, ligament, and connective tissue. The hip flexors, glutes, piriformis, and deep external rotators all need space to function well. Modern life—sitting at desks, in cars, on couches—shortens and tightens these muscles. Running, cycling, and walking build hip strength, but they don't stretch the deeper muscles that restrict your range of motion. Pigeon pose targets the external rotators and glutes in ways most daily activities don't touch. When those muscles release, you often notice less lower back pain, easier walking, and better posture.
How to Practice Pigeon Pose: Step-by-Step
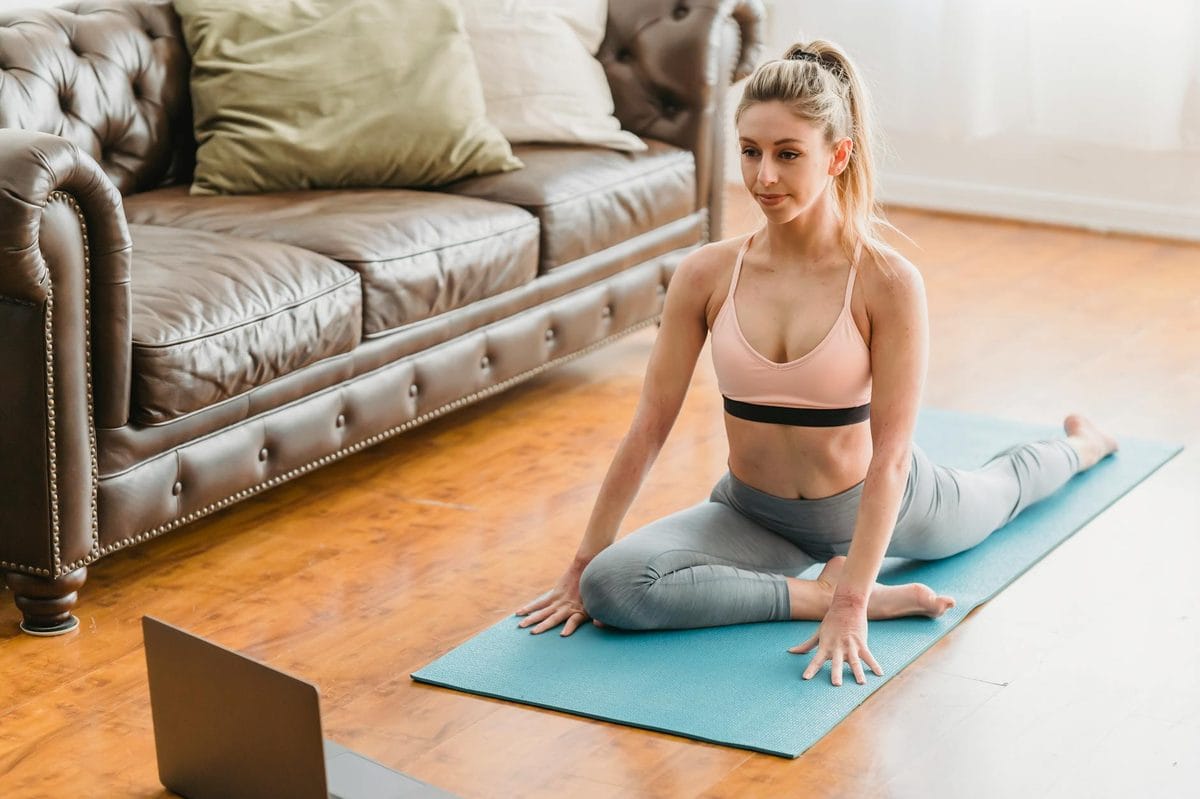
Start in downward dog or on all fours. Bring your right knee forward toward your right wrist, so your right shin sits at an angle across your mat—not straight forward, but closer to a 45-degree angle. Your right foot lands somewhere near or slightly beyond your left hip. Press your hip points down toward the mat. Walk your hands forward as far as feels reasonable, keeping your torso upright at first. You can stay here with a neutral spine, or fold forward if your flexibility allows. Breathe for 5 to 10 breaths, then switch sides.
Common Alignment Mistakes to Avoid
The biggest error is forcing your front shin to be parallel to the mat's edge. That extreme position stresses your knee joint. Your shin angle should feel natural—as if your front leg is simply rotated outward from where it naturally wants to go. A second mistake is hiking your back hip off the mat while your front hip stays grounded. Both hips should reach toward the floor equally. If your front hip lifts significantly, you're not ready for a deep fold yet; this is where props help. Don't let your lower back arch or round excessively. Neutral spine comes first, depth comes later.
Using Props for Comfort and Safety
If your front hip hovers above the mat, place a yoga block or cushion underneath it. This small adjustment keeps your pelvis level and protects your lower back. If the stretch feels intense even with the prop, fold forward only slightly, or place your hands on another block under your chest. A yoga strap looped around your back leg can also help you stay present rather than forcing deeper. Props aren't shortcuts—they're tools that let you access the pose's benefits without injury. Most yoga studios stock blocks ($15–30) and straps ($10–20), or you can use firm cushions or a towel at home.
Who Should Modify or Skip Pigeon Pose
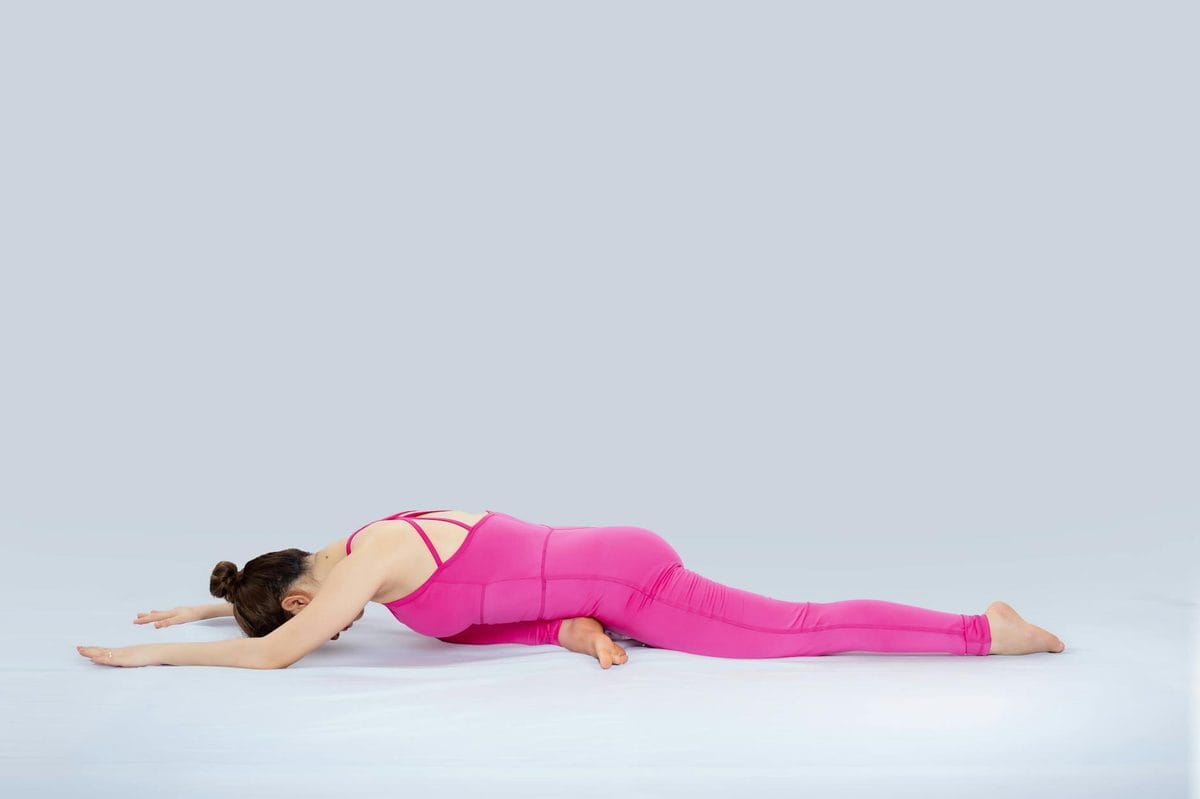
If you have knee pain, sacroiliac joint sensitivity, or a history of hip surgery, approach pigeon pose with extra caution or skip it entirely. Reclined pigeon (supta eka pada rajakapotasana) is a safer variation: lie on your back, draw your right knee toward your chest, and thread your hands through your legs to hold your left thigh. This reduces stress on the knee and gives you more control. If you're pregnant, your ligaments are looser due to relaxin hormone, making deep hip stretches risky; gentle, supported versions work better. If you're recovering from a hip flexor strain, wait until your physical therapist clears you.
How Often and How Long to Hold Pigeon Pose
Beginners should hold pigeon pose for 5 to 8 breaths per side, 2 to 3 times per week. As your hips open, you can extend to 1 to 2 minutes per side. More time isn't always better; consistent, mindful practice beats occasional aggressive stretching. If you practice yoga regularly at a studio—say, a vinyasa or hatha class 3 times weekly—pigeon pose might appear once per week in class. For home practice, add it on days you don't attend class. The Yoga Sutras remind us that asana should be "sthira sukham," steady and easeful. If pigeon pose feels aggressive, you're pushing too far.
Signs You're Ready to Go Deeper
Your front hip sits level with your back hip, and both are grounded. You can fold forward with a long spine (not rounding your back). The stretch feels intense but not painful; there's no sharp sensation in your knee or hip joint. You've been practicing pigeon pose regularly for at least 4 to 6 weeks. If these conditions aren't met, stay in a shallower version. Depth is a byproduct of consistent, gentle practice—not a goal in itself.
A Realistic Timeline for Hip Opening
Most people notice a shift in their hips after 3 to 4 weeks of regular pigeon practice. You might wake up and realize you sat cross-legged without discomfort, or you feel less stiffness when you stand up from your desk. Real change takes time and repetition. The Niyamas—yoga's ethical observances—include tapas (disciplined effort) and svadhyaya (self-study). Notice what changes in your body, your posture, your comfort level. This self-awareness is as important as the physical opening itself.
Pigeon pose is a gift for anyone whose hips have tightened from modern life. Approach it with patience, respect your body's limits, and use props without shame. Your hips will thank you.
Subscribe to the newsletter
Subscribe to my newsletter to get the latest updates and news